No products in the cart.
User Manual & guides
A Guide on Resolving the “Windows Can’t Stop your Generic Volume Device” Error

11
Aug
Aug
#WindowsCannotStopGenericVolumeDevice #ErrorFix #SafelyEjectUSBDrive #Windows11 #Windows10 #BackgroundAppProcesses #TaskManager #FixFileExplorerError #RestartFileExplorer #HardwareAndDevicesTroubleshooter #QuickRemovalOption #DisableWriteCaching #DeselectIndexing #OfflineModeForUSBDrive #ChangeDriveLetter #SafelyEjectUSBDrive
Title: Resolving the “Windows Can’t Stop your Generic Volume Device” Error
Introduction:
Encountering the “Windows Can’t Stop your Generic Volume Device” error message when trying to safely remove a USB device from your computer can be frustrating. However, with a few simple steps, you can swiftly fix this issue. In this article, we will guide you through the process of resolving this error on your Windows operating system.
Image: [Insert relevant image illustrating the process of safely removing a USB device]
Section 1: Understanding the Cause of the Error
The “Windows Can’t Stop your Generic Volume Device” error typically occurs when a program or process on your computer is still utilizing the USB device you are attempting to eject. This error message serves as a precautionary measure to prevent potential data loss or damage.
Section 2: Closing Open Programs or Processes
1. Start by closing any open documents or files stored on the USB device.
2. Check the system tray (located in the bottom-right corner of your screen) for any running applications that may be accessing the device.
3. Right-click on the application’s icon and choose the “Close” or “Exit” option.
4. Repeat this process for all applications that are actively using the USB device.
Section 3: Ensuring No Background Processes are Active
1. Press “Ctrl + Shift + Esc” to open the Task Manager.
2. In the “Processes” tab, carefully examine the list of programs and processes running.
3. Locate any items that might be utilizing the USB device.
4. Right-click on the respective program/process and select the “End Task” or “End Process” option.
5. Close the Task Manager.
Section 4: Using the Windows Device Manager
1. Press the “Windows + X” key combination and select “Device Manager” from the menu.
2. In the Device Manager window, expand the list of “Disk drives.”
3. Right-click on the USB device causing the error and select “Disable” from the context menu.
4. Wait for a few seconds and then right-click on the disabled device again.
5. This time, choose “Enable” to reactivate the device.
Section 5: Safe Removal of the USB Device
1. After following the above steps, try to safely remove the USB device as usual.
2. Right-click on the device’s icon in the system tray and select the “Safely Remove Hardware and Eject Media” option.
3. Select the desired USB device from the list and click on the “Stop” button.
4. Wait for the confirmation message indicating that it is safe to remove the device.
5. Unplug the USB device from your computer successfully.
Conclusion:
By adhering to these straightforward steps, you can overcome the “Windows Can’t Stop your Generic Volume Device” error on your Windows operating system. Safely removing USB devices is essential to prevent data corruption and ensure smooth operation. Remember to always follow the proper procedure to protect your files and devices.
It’s advisable to safely eject a USB drive inserted in your Windows 11/10 PC. However, upon doing so, some users report seeing an error message that reads “Windows can’t stop your generic volume device.” Consequently, users can’t safely eject USB drives with their PCs on.
Of course, you can still safely remove a USB drive with a PC off. However, many users still prefer to be able to safely eject their connected drives without shutting down their computer. This is how you can fix the “Windows can’t stop your generic volume device” error.
1. Disable Background App Processes
Disabling background app processes is the first thing you should try when you see the “Windows can’t stop your generic volume device” error. Even the error message suggests closing programs that could still be using the device.
Make sure there aren’t any minimized software windows on your taskbar; close unneeded apps within the system tray area by right-clicking their icons and selecting exit options.

Beyond the taskbar and system tray, you’ll need to look for and disable background app processes with Task Manager. Task Manager is a tool that provides a comprehensive overview of app and service background processes.
Our guide on fixing too many background processes running provides more detail on how to terminate unneeded background apps and services with Task Manager.
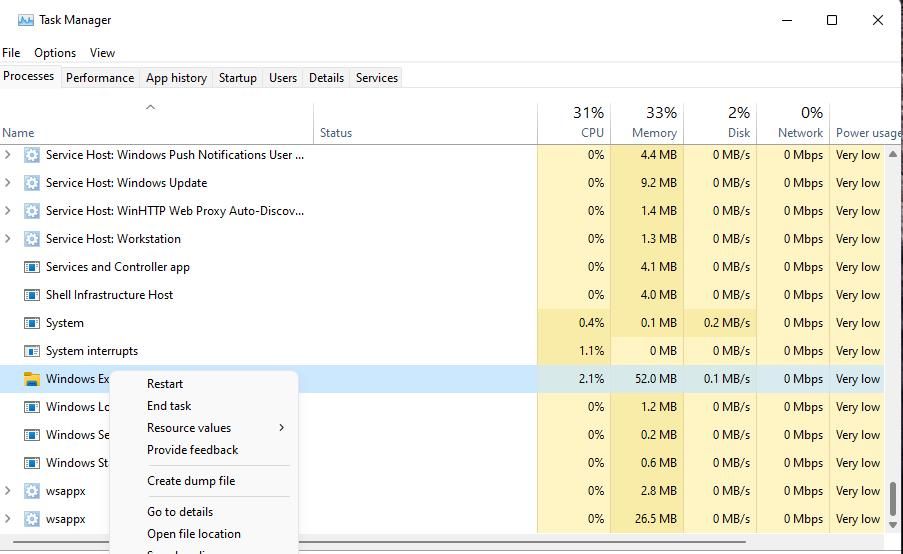
2. End and Restart the Windows Explorer Process
Some users confirm ending and restarting the File Explorer process fixes the “Windows can’t stop your generic volume device” error. That highlights File Explorer is causing the error and needs to be stopped from utilizing the USB drive.
Follow these steps to end and restart File Explorer:
- Right-click a taskbar space and select the Task Manager context menu option.
- Scroll down the Processes tab in Task Manager until you see Windows Explorer.
- Right-click Windows Explorer and select End task. Your desktop will go blank, but restarting Explorer will restore it.
- Click Task Manager’s File menu.
- Select Run new task on the menu.
- Then input explorer in Create new task.

- Select Create this task with administrative privileges.
- Click OK to restart Explorer.


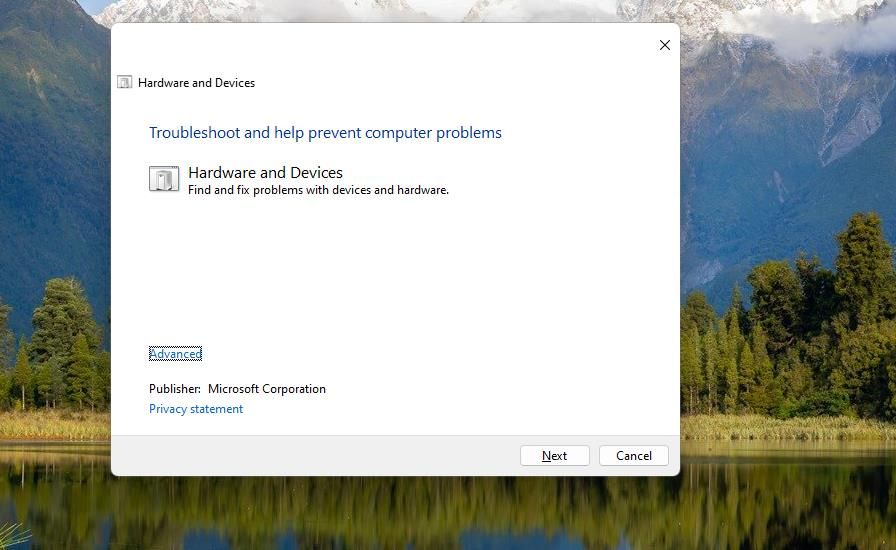
3. Troubleshoot the Device
You can troubleshoot a USB device by running the Hardware and Devices troubleshooter with the drive connected. That troubleshooter might address some drive ejection issues.
The Hardware and Devices troubleshooter isn’t listed in Settings. However, you can still find and use it by opening it via the Command Prompt using these steps:
- Press Windows key + S to activate a file search tool, and input Command Prompt within its text box.
- Select Command Prompt to open it from the search results.
- Input and execute this Hardware and Devices command:
msdt.exe -id DeviceDiagnostic
- Click Next to run the troubleshooting tool.
- The troubleshooter might ask you to select a device. If it does, select your connected USB storage device.
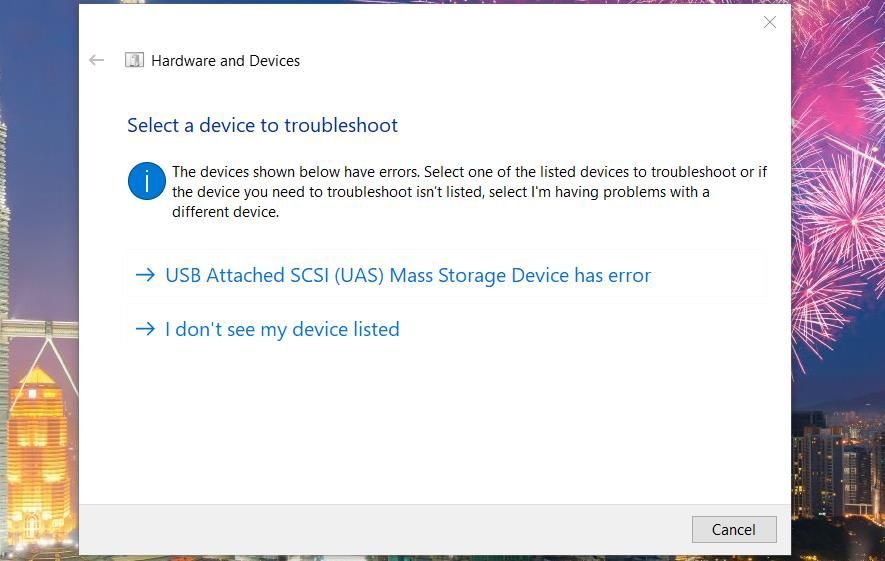
- Click Apply this fix if the Hardware and Devices troubleshooter suggests a resolution.


4. Select the Quick Removal Option
Selecting the Quick Removal option is another confirmed fix for the “Windows can’t stop your generic volume device” error. The Quick Removal option disables write caching. You can select the Quick Removal option for an affected drive using the following steps:
- Click File Explorer’s taskbar shortcut and select This PC.
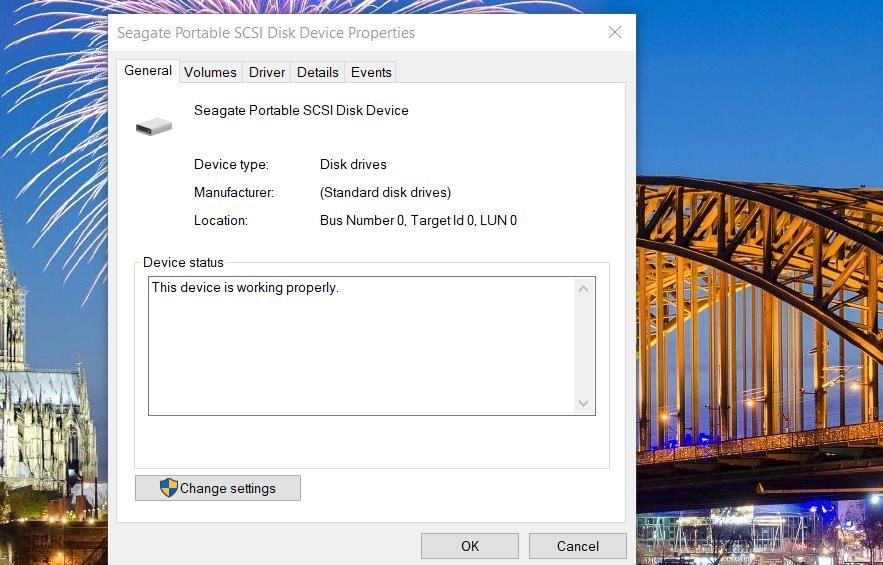
- Right-click your USB drive and select Properties.
- Click the Hardware tab.
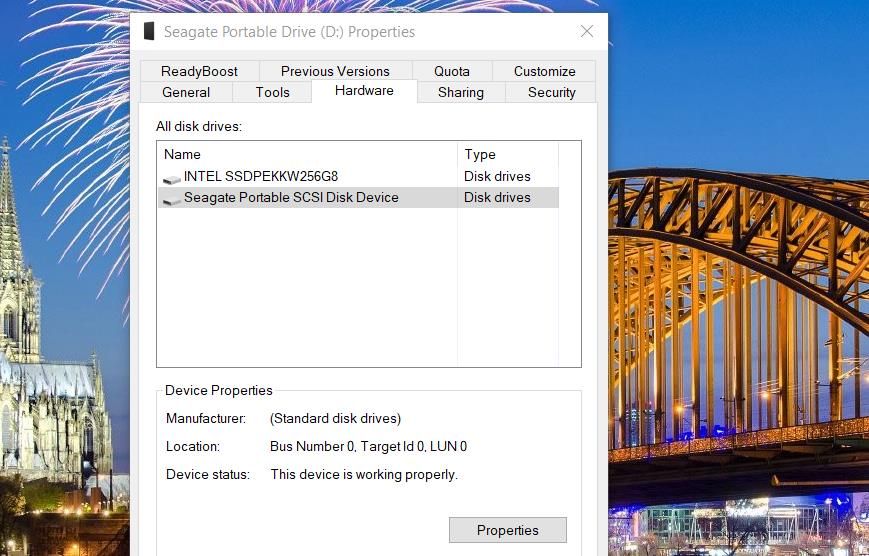
- Then press the Properties button.
- Click Change settings to bring up another window.
- Select Policies in the second window.
- Then click the Quick removal (default) option.
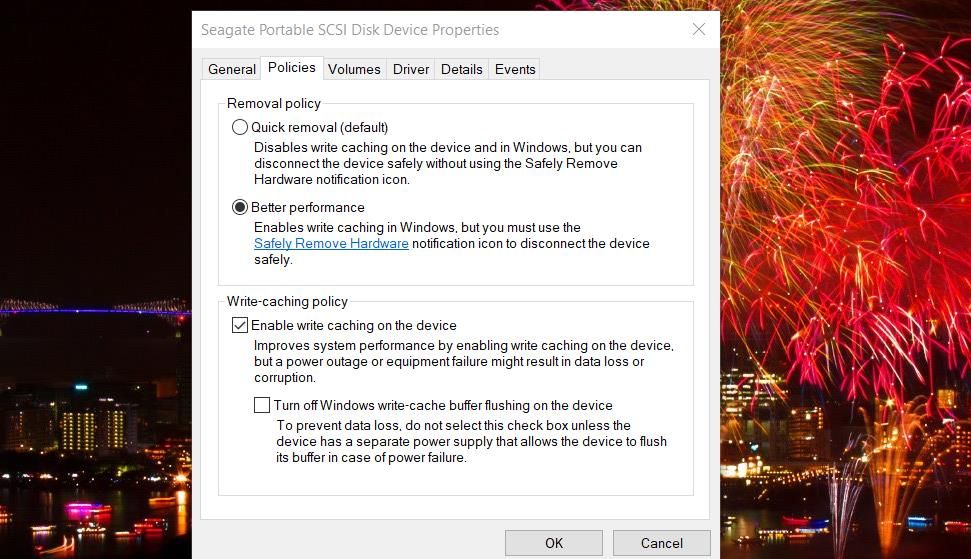
- Select OK to exit the device properties window.


5. Deselect the Index Drive Setting
Having file indexing enabled for an external USB drive can cause the “Windows can’t stop your generic volume” error. If that option is enabled, files copied onto your USB drive will be indexed, which can keep it in use for some time after transferring lots of files onto it.
Follow these steps to deselect indexing for a USB drive:
- Go to This PC in File Explorer.
- Right-click the USB drive connected and select Properties.
- Deselect the Allow files on this drive to have contents indexed in addition to file properties option.
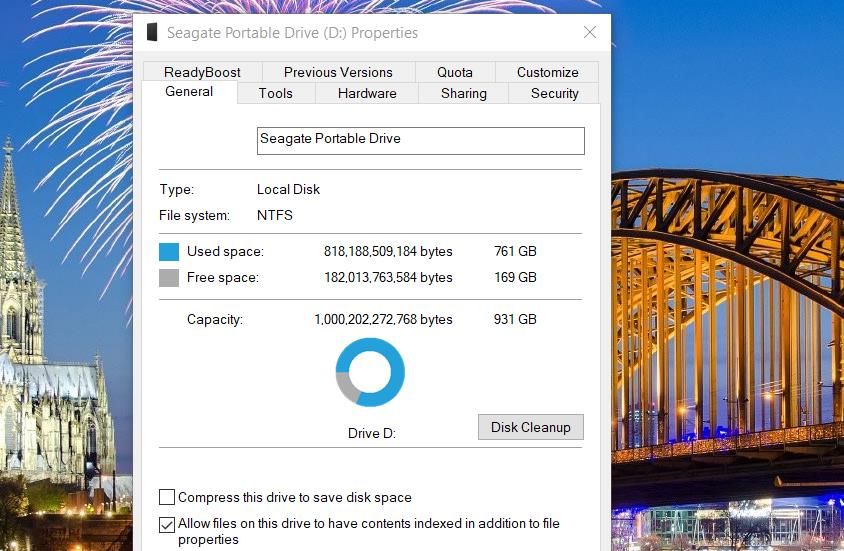
- Select Apply and OK to set the drive’s new setting.

6. Set the Connected USB Drive to Be in Offline Mode
A lot of users have fixed the “Windows can’t stop your generic volume device” error by setting their USB drives into offline mode. So, try setting your connected USB drive to offline mode with the DiskPart command-line line tool using these steps:
- Press the Windows logo + R key combo for activating Run.
- Input cmd into Run, and press Ctrl + Shift + Enter to open Command Prompt as an administrator.
- Then input this Diskpart command and hit Enter:
diskpart - To view a drive list, input the following text and press Return:
list disk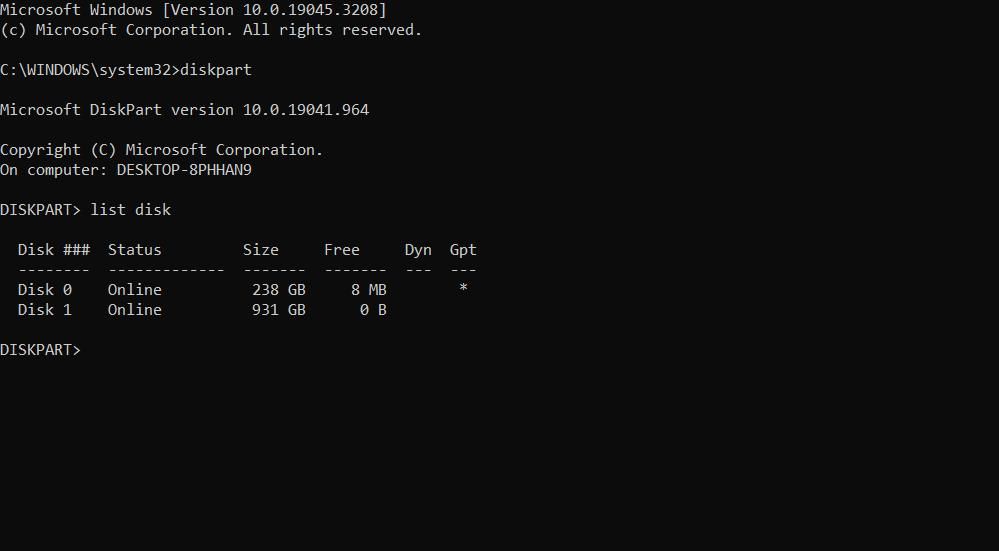
- Next, execute this command to select your USB drive:
select disk <drive number> - Finally, set the selected disk to offline by executing this command:
offline disk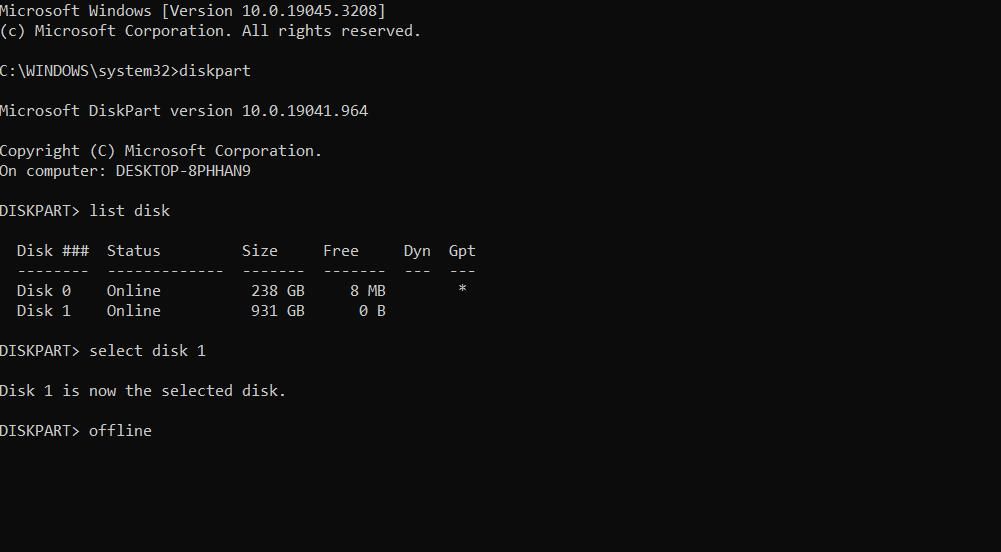


You will need to replace <drive number> for the select disk command with the actual number of your USB drive listed by Diskpart. For example, if your USB drive is disk 1, the required command would look like this:
select disk 1
Setting a drive offline changes its status to missing. You can set the same drive back to an online status by repeating steps one to five above and then executing this command:
online disk
7. Assign a Different Letter to the USB Drive
Some users have also resolved the “Windows can’t stop your generic volume device” by changing the letters of their USB drives. Assigning a different letter to a USB drive will disconnect it from certain processes.
You can even change the drive letter back to what it originally was another time. To apply this fix, check out this guide to changing a drive’s letter in Windows.

Safely Eject Your USB Drive
Removing a USB drive from a PC without safely ejecting it can corrupt the data on it. So, it’s not a good idea to ignore the “Windows can’t stop your generic volume device” error.
Applying the potential solutions covered here will resolve the error for most users. Then, you can safely remove your USB drive in Windows 11/10 with alternative methods.

